It seems that the Navigation Drawer is here to stay. I like the pattern besides some criticism, so I decided to implement it on a couple of apps I'm working on. What you can read here are just my thoughts about what I found interesting about it, hoping to help and learn from others.
I’ve been studying the official Material Design specs for the Navigation Drawer, and I found out they are nice but a bit confusing, when it comes down to the actual width specs. So here’s what I found to be working nicely and pretty much matches Google’s best implementation, GMail for Android.
In the Google IO 2015, Google released the Android Support Design Library. It’s the recommended and easy way to add a Nav Drawer to your apps.
All talks done,Now lets get started
All talks done,Now lets get started
Creating new project:
Select File ->new Android Project when it prompt select Navigation Drawer Application
Adding the required dependencies:
compile 'com.android.support:design:23.1.1'
compile 'de.hdodenhof:circleimageview:1.3.0'
compile 'com.android.support:design:23.1.1'
compile 'de.hdodenhof:circleimageview:1.3.0'
dependencies {
    compile fileTree(dir: 'libs', include: ['*.jar'])
    testCompile 'junit:junit:4.12'
    compile 'com.android.support:appcompat-v7:23.1.0'
    compile 'com.android.support:design:23.1.1'
    compile 'de.hdodenhof:circleimageview:1.3.0'
}
Open the activity_main.xml where we will add the navview to it.
<?xml version="1.0" encoding="utf-8"?>
<android.support.v4.widget.DrawerLayout xmlns:android="http://schemas.android.com/apk/res/android"
    xmlns:app="http://schemas.android.com/apk/res-auto"
    xmlns:tools="http://schemas.android.com/tools" android:id="@+id/drawer_layout"
    android:layout_width="match_parent" android:layout_height="match_parent"
    android:fitsSystemWindows="true" tools:openDrawer="start">

    <include layout="@layout/app_bar_main" android:layout_width="match_parent"
        android:layout_height="match_parent" />

    <android.support.design.widget.NavigationView android:id="@+id/nav_view"
        android:layout_width="wrap_content" android:layout_height="match_parent"
        android:layout_gravity="start" android:fitsSystemWindows="true"
        app:headerLayout="@layout/nav_header_main" app:menu="@menu/activity_main_drawer" />

</android.support.v4.widget.DrawerLayout>
Open the app_bar_main.xml and paste the below code:
This layout file will help to add the app_bar(toolbar ) .
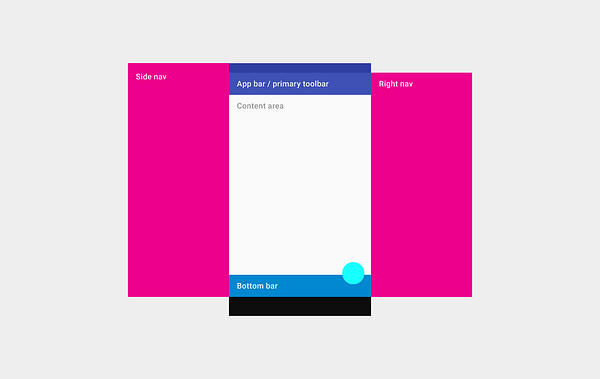
As the pattern evolved, it started to have some inconsistencies. When Material Design arrived, it was clear that this two pieces of paper could not live any longer at the same level having different hierarchies in the view. There was a lot of chat about it, and even more, and Google didn't help much, but now the Navigation Drawer position is define as the next:
<?xml version="1.0" encoding="utf-8"?>
<android.support.design.widget.CoordinatorLayout
    xmlns:android="http://schemas.android.com/apk/res/android"
    xmlns:app="http://schemas.android.com/apk/res-auto"
    xmlns:tools="http://schemas.android.com/tools" android:layout_width="match_parent"
    android:layout_height="match_parent" android:fitsSystemWindows="true"
    tools:context=".MainActivity">

    <android.support.design.widget.AppBarLayout android:layout_height="wrap_content"
        android:layout_width="match_parent" android:theme="@style/AppTheme.AppBarOverlay">

        <android.support.v7.widget.Toolbar android:id="@+id/toolbar"
            android:layout_width="match_parent" android:layout_height="?attr/actionBarSize"
            android:background="?attr/colorPrimary" app:popupTheme="@style/AppTheme.PopupOverlay" />

    </android.support.design.widget.AppBarLayout>

    <FrameLayout
        android:id="@+id/fragment_container"
        android:layout_width="match_parent"
        android:layout_height="match_parent">

    </FrameLayout>

    <android.support.design.widget.FloatingActionButton android:id="@+id/fab"
        android:layout_width="wrap_content" android:layout_height="wrap_content"
        android:layout_gravity="bottom|end" android:layout_margin="@dimen/fab_margin"
        android:src="@android:drawable/ic_dialog_email" />
Create a nav_header_main.xml layout which include the first half of the navigation drawer with a profile image and name.
The profile picture is rounded. There are different ways to get a rounded image, but I always remember this publication by Romain Guy talking about how to do it. So I decided to go with CircleImageView, it’s based on the Romain Guy techniques which can't be wrong. I haven't check the one used on the Google IO app but might worth to take a look at it.
The image has a white border in Google Play Movies and Google Play Books. The other Google apps don’t have such a border. Google+ and Hangouts have the profile picture in the toolbar and it has the white border tho.
<?xml version="1.0" encoding="utf-8"?>
<RelativeLayout xmlns:android="http://schemas.android.com/apk/res/android"
    android:layout_width="match_parent"
    android:layout_height="190dp"
    android:background="@drawable/background_material_red"
    android:orientation="vertical">

    <de.hdodenhof.circleimageview.CircleImageView
        xmlns:app="http://schemas.android.com/apk/res-auto"
        android:id="@+id/profile_image"
        android:layout_width="70dp"
        android:layout_height="70dp"
        android:src="@drawable/profile"
        app:border_color="#FF000000"
        android:layout_marginLeft="24dp"
        android:layout_centerVertical="true"
        android:layout_alignParentLeft="true"
        android:layout_alignParentStart="true"
        android:layout_marginStart="24dp" />

    <TextView
        android:layout_width="wrap_content"
        android:layout_height="wrap_content"
        android:text="venkatesh pillai"
        android:textSize="14sp"
        android:textColor="#FFF"
        android:textStyle="bold"
        android:gravity="left"
        android:paddingBottom="4dp"
        android:id="@+id/username"
        android:layout_above="@+id/email"
        android:layout_alignLeft="@+id/profile_image"
        android:layout_alignStart="@+id/profile_image" />

    <TextView
        android:layout_width="wrap_content"
        android:layout_height="wrap_content"
        android:text="AndroidXU.com"
        android:id="@+id/email"
        android:gravity="left"
        android:layout_marginBottom="8dp"
        android:textSize="14sp"
        android:textColor="#fff"
        android:layout_alignParentBottom="true"
        android:layout_alignLeft="@+id/username"
        android:layout_alignStart="@+id/username" />

</RelativeLayout>
The main activity class will help to toggle the open and closure of the navigation drawer.
    package com.androidxu.navigationdrawer;

    import android.os.Bundle;
    import android.support.design.widget.FloatingActionButton;
    import android.support.design.widget.Snackbar;
    import android.view.View;
    import android.support.design.widget.NavigationView;
    import android.support.v4.view.GravityCompat;
    import android.support.v4.widget.DrawerLayout;
    import android.support.v7.app.ActionBarDrawerToggle;
    import android.support.v7.app.AppCompatActivity;
    import android.support.v7.widget.Toolbar;
    import android.view.Menu;
    import android.view.MenuItem;
    import android.widget.TextView;

    public class MainActivity extends AppCompatActivity
            implements NavigationView.OnNavigationItemSelectedListener {

        NavigationView navigationView = null;
        Toolbar toolbar = null;

        @Override
        protected void onCreate(Bundle savedInstanceState) {
            super.onCreate(savedInstanceState);
            setContentView(R.layout.activity_main);

            //Set the fragment initially
            MainFragment fragment = new MainFragment();
            android.support.v4.app.FragmentTransaction fragmentTransaction =
                    getSupportFragmentManager().beginTransaction();
            fragmentTransaction.replace(R.id.fragment_container, fragment);
            fragmentTransaction.commit();

            toolbar = (Toolbar) findViewById(R.id.toolbar);
            setSupportActionBar(toolbar);

            FloatingActionButton fab = (FloatingActionButton) findViewById(R.id.fab);
            fab.setOnClickListener(new View.OnClickListener() {
                @Override
                public void onClick(View view) {
                    Snackbar.make(view, "Replace with your own action", Snackbar.LENGTH_LONG)
                            .setAction("Action", null).show();
                }
            });

            DrawerLayout drawer = (DrawerLayout) findViewById(R.id.drawer_layout);

            ActionBarDrawerToggle toggle = new ActionBarDrawerToggle(
                    this, drawer, toolbar, R.string.navigation_drawer_open, R.string.navigation_drawer_close);
            drawer.setDrawerListener(toggle);
            toggle.syncState();

            navigationView = (NavigationView) findViewById(R.id.nav_view);

            //How to change elements in the header programatically
            View headerView = navigationView.getHeaderView(0);
            TextView emailText = (TextView) headerView.findViewById(R.id.email);
            emailText.setText("newemail@email.com");

            navigationView.setNavigationItemSelectedListener(this);
        }

        @Override
        public void onBackPressed() {
            DrawerLayout drawer = (DrawerLayout) findViewById(R.id.drawer_layout);
            if (drawer.isDrawerOpen(GravityCompat.START)) {
                drawer.closeDrawer(GravityCompat.START);
            } else {
                super.onBackPressed();
            }
        }

        @Override
        public boolean onCreateOptionsMenu(Menu menu) {
            // Inflate the menu; this adds items to the action bar if it is present.
            getMenuInflater().inflate(R.menu.main, menu);
            return true;
        }

        @Override
        public boolean onOptionsItemSelected(MenuItem item) {
            // Handle action bar item clicks here. The action bar will
            // automatically handle clicks on the Home/Up button, so long
            // as you specify a parent activity in AndroidManifest.xml.
            int id = item.getItemId();

            //noinspection SimplifiableIfStatement
            if (id == R.id.action_settings) {
                return true;
            }

            return super.onOptionsItemSelected(item);
        }

        @SuppressWarnings("StatementWithEmptyBody")
        @Override
        public boolean onNavigationItemSelected(MenuItem item) {
            // Handle navigation view item clicks here.
            int id = item.getItemId();

            if (id == R.id.nav_camara) {
                //Set the fragment initially
                MainFragment fragment = new MainFragment();
                android.support.v4.app.FragmentTransaction fragmentTransaction =
                        getSupportFragmentManager().beginTransaction();
                fragmentTransaction.replace(R.id.fragment_container, fragment);
                fragmentTransaction.commit();
                // Handle the camera action
            } else if (id == R.id.nav_gallery) {
                //Set the fragment initially
                GalleryFragment fragment = new GalleryFragment();
                android.support.v4.app.FragmentTransaction fragmentTransaction =
                        getSupportFragmentManager().beginTransaction();
                fragmentTransaction.replace(R.id.fragment_container, fragment);
                fragmentTransaction.commit();

            } else if (id == R.id.nav_slideshow) {

            } else if (id == R.id.nav_manage) {

            } else if (id == R.id.nav_share) {

            } else if (id == R.id.nav_send) {

            }

            DrawerLayout drawer = (DrawerLayout) findViewById(R.id.drawer_layout);
            drawer.closeDrawer(GravityCompat.START);
            return true;
        }
    }
Run
Once you run the app you can easily see the working of navigation drawer.Summary
In this chapter on the Material Design Navigation Drawer is from my point of view the most important. A lot of misunderstandings about the history and purpose of the Navigation Drawer can lead to gross mistakes. Even if you have a perfectly sized and styled Nav Drawer, remember that the Nav Drawer is a tool and not an end.


1 comments so far
I must be missing something as I can't get the code to compile - things are missing.
do you have a full working package?
EmoticonEmoticon